Friday, 9 December 2016

Biriyani Recepie/Coocked by me 😀😇😆

Well im so much glad whenever i cocked.I dnt know why , may be because i usually am a lazy person and i don't cook in regular basis so when ever i have cocked im getting too much excited.But one thing is i love experimenting with cocking and makeup.I love to do so. I think most of today's girl have this strength i mean the confident power. But im not promoting that im a big #confident kind of person whatever i have done i dnt recreate or i have done everything with getting over confident or confident.No,..big no..im a simple girl i simply done anything without thinking the result im such kind of a foolish..and i also loose my confident many time and many places. Then i spend some time with just of my self.For knowing the exact reason or about the future result..oh oh..

Sorry, but im too me im too talkative that i can't understand when i turns to an other topic from a different. I have to improve and if you have any suggestions please comment..and how many r there who loves #Biriyani. I just loveee biriyani.. And i cooked it in my way and today im going to share the whole process the method what i have followed so please stay tune till the end. And also have some tips to share what i practically do, a kind of life hack... then what are we waiting for just blink into that.


List what We Need:::(Ingredients)
Masala:
1)Garam masala
2)Salt
3)Haldi
4)Chilli powder
5)Cumin Powder
6)Corriender Powder
7)Biriyani Masala
8)Black paper powder

Dry Masala:
1)Clove
2)Bay leaves
3)Cardamom
4)Dry red Chillis
5)Cumin seeds
6)Kesar
7)Cinnamon

Veggies :
1)Onion
2)Garlic
3)Chillis
4)Coriander leafs
5)Tomato
6)Capsicum
7)Potatoes(optional)
8)Lemon

Rest Ingredients :
Chicken,
Basmati rice
Dahi/Yogurt
Chicken Big Pieces/leg pieces
Refined oil/white oil
Kewra water, Rose water


Lets jump into that recipe.First of all we have to wash our vegetables and chicken with cold water.Then we need to marinade the chicken at least 3-4 hours before coocking.For marinading we need garam masala, cumin powder,coriander powder, red chilli powder and 3-4 Onion smashed for 1 kg chicken and 6-7 table spoon of curd. Mixed all the things welly with the chicken and keep in the refrigerator  .Then chopped the onions , the garlics ,capsicum and green chillies into pieces.And then fry all the veggies one after another.Firstly put on the high flame and take a frying pan fry all the ingredients like bay leaves, cardamom, cloves, Cinnamon, onions, garlic in a medium to high flame and keep stirring then when all the things gets brown in colour you need to put some capsicum, tomatos, green chillies and stire all the things into frying pan very delicately then when oil get separated from the veggies then it would be the perfect time to give marinated  chicken into it .And keep stiring welly and mixed the chicken with all things after that you can add all the masalas into it. And do not stop stirring and add a little cup of water into it and keep  string.You can add potatos or egg into it and dnt stop string still the chicken doesn't cook.

Coocked biriyani chicken goona be look like this pic ⏫🔺

Next come to the rice part.Soaked the rice into water before 30 mins of coocking.Then boiled a handi full of water pour some Cinnamon cloves cardamom bay leaves black paper and pour the rice into that mixture and add some oil 3-4 tea spoon and some salt.When the rice get welly coocked  you have to separate the rice from the water and then keep a handi into low flame and pour some rice Lyre and then add some coocked chicken then add some rice on the top of it and then add some chicken then rice. Keep follow the steps and add some fried onions then  take a  half tea cup of milk and soaked some kesar into it and add rose water kewra water into it  and put drop by drop this mixture into on the biriyani handi in a low flame after  5-10 Min shake well the handi for mixed everything in a good manner. And a sweet aroma comes into it and your biriyani is ready for serve..
Biriyani

Let me know how does you feel about it. Have you tried this then pls let me know if not then go and try this it is an amazing indian sahi dish. You can follow me on my all social media fb instagram twitter to know more about future posts or updates.. Untill then stay happy and eat healthy ..

Sunday, 4 December 2016

How i have done hair cut And Soft makeup look

Hey friends today im going to tell you about how did i got these hair cut??😉 and about a soft makeup tutorial.Im so curious kind of public so when i thought that i wanna do it or i just only need this then nobody can come into my side. So something like these kind of thing happens with me also.So i decide that i would have to done my hair style with my self. So i started  researching and i found that oh oh oh.. Wait wait.. I wanna done" front frinch"..For that what i need is, that a ceaser and water sprey bottle.


METHOD OF HAIR CUTTING::💇

I just spray the water into my hair and let them wet.What ever section you want to cut, first of all this you must have to wet that hair part . As i wanna cut front hair section so i did wet the front hair part. Then if i wanna take my front friench into right i have to take it onto the opposite or left direction and wet it with water and cut it from front to down but not straight its have to have 📏 these kind of shape(oblige) to be maintained when you are going to cut your hair.. Also you should remember one thing when you want to cut a front friench you would be gather all the hair you want to cut and hold them like parallel line and then maintain the line and cut it of like a paralal line.Then You can see your frinch and flip it in opposite direction.
Lets come to my soft makeup look 👸

Face:
For this look whatever i have done is that i used a primer all over my face and used  lotus herbal sunscreen with slight amount of very me foundation and blend it with makeup sponge.It gives me a smooth glowy natural  day time look. This base also gives a fresh look.And as it is a day time kind of look so you should apply A sunscreen first then you can protect your skin from sun effect and the harmful uv A uv b rays. And if you skip the sunscreen then it may damage your skin, gives you a premature ageing dark spots. So don't forget that steps. There are so many good options for sunscreen such as Oriflame SPF 50,30 lotus e. T. C. The oriflame gives a photo stable Formula so if you want to splash your face with water then it wouldn't go anywhere it stays like photo which doesn't move. And the lotus has also some good ingredient into it. So love these two..

Eyes:
For eyes i just kept it as simple as i can. For that i just applied my Oriflame's The one Eyeliner Stylo.It is a pen eye liner so it is very comfortable and easy for me to apply any kind of shape you want.Here i slightly winged it at the outer Corner. Let it dry. And just did so for eyes. This pen is a smudge and water proof and jet black liquid eyeliner but in pen form. And the nip is also comfortable for any starer or matured.I also applied some mascara i used volume blast mascara from Oriflame.I also will give a review on it. Because it deserves.


Eyebrows:
For eyebrows i just comb it and applied Lakeme eyebrow pencil lightly and again brush it of my brows shape and applied little bit of highlighter under the eyebrow bone.

Cheecks:
For cheecks i applied maybline creamy blush. Really it is so easy to use and also gives a natural look.And the blush colour is so soft pink and on the top of it i used my favorite the one illuminating highlighter by Oriflame. It is just amazing. So soft semi creamy very nice creamy and silvery kind of glow it just reflects a bright glow. This two combination is outstanding.

Lips:
For lips i used a soft orangish red kind of colour From The one 5-1 creamy lipstick shade Coral ideal From Oriflame . It is a soft creamy lipstick very pigmented.It is quite long lasting. It also soften your lip and keep them hydrated and you need not any lip blam before it. This rang have various colours.It also compliments my look.

You can present this look with a high bun or a high pony tail. With this hope you enjoyed my tips and tricks for this simole soft few makeup product look. Please show some love into comment and pls share and like..You can follow me on intagrame, facebook for futures post updates.. Just type Swetleena Chatterjee in Facebook o and instagram and leave a message from your side i will be glad to reply it. Until my next blog post stay happy and be confident.

Let me know what do you think about this look or those product which i have used and my hair cut.


Thursday, 1 December 2016

Simple Nail Designs /Diy

Hi friends how are you all..Im not in good health.So it is my first post among past 10 days.Sorry for that.:-:-(

Since long i didn't do any nail art kind of stuff. So i though today i should do something different which i never tried. As im not a professionalised so you can understand that work is not so perfect but i surly will try for better work in my future.

So today im going to show you five easy nail art or you can say designs.As the title say they are really easy to do.


Here i have used maximum from Oriflame except one. All the shades will be mention in below.


Here i have used Oriflame pure colour nailpolish shade Intense pink And Oriflame Metalic nailpolish Twellight dust.

About product:
The pure colour nailpolish is a low price glowy colour but does not contain glitters. Also very pigmented you can get perfect colour Just usage of one coat.It is also easy to remove from nails and does not left any colour behind.
On the other hand the metallic nail polishes contains micro mild glitter particles in it and also gives some metallic shine. It looks so pretty and it is too easy to get rid of kind of stuff when you use the nail polish remover.
All the two shades many different colour options.

HOW TO GET THAT DESIGNS :
Devide the nails and left side i have used the pink nail polish and other side i have used the metallic nailpolish. Which provided a nice cute nail are. And on the the top of the nailpolishs i gave some black dots to make that look more cute..

1.                                        2.


In the first pic i used two colours. One from Oriflame The one rang and another is from Gala.


About the Product :

The One colour is a intense deep colour with a dark black colour and the quality is so good.It is again easy to remove. If you have this then tell me about it and if you don't have then you should go, and give them a try there are a lots of colours to choose.

The next one is from different brand called gala. Also pigmented one. You need to apply 2-3 quotes to get that colour you want.It left quite mark of its colour after using remover. It is very cheap in rang.


HOW TO  GET THAT DESIGNS:

Firstly i have applied the black then gave three pink tiny lines with the help of gala pink nailpolishe. It is a classy Cole what will give a great lights on  ,in your hand.


For the second design i just used a trick for the duo effect. You can see that there us a black effect under the pink colour.what i did, is i just touch, little my pink colour nailpolish brush into the black colour then i applied it into my nail thus i get that duo kind of look, after that i apply the peach pink colour from Oriflame pure rang then at the top i applied the Very me metallic nailpaint called Twilight dust.


For the forth art whatever i have done is ,i just apply a short sticky paper between my nail and on the two side i applied coral orange from oriflamer pure colour and classic red  also from that rang. This red is very pretty red i love the texture colour is very lequidy it dries also fast and all colours are stay quite as it is for 2 weeks without any top base coat.After applied the two colour then pull off the sticky paper and in this blank place applied a nude colour called trendy nude is also from same collection from Oriflame. Actually this shades are quite affordable and are so many in colours. I love to play with colours. Pure colour each cost 169 buck.

 Now im talking about the last designs.Also this are so easy to do you can try this too and let me know how you feel about these or share some of your nail art. Now, for the last design i used the previous red and The One Long wear Nail polish black in colour. It is currently out of catalogue.But what i done is that firstly applied classic red colour and applied the black nail polish only two little drop on the top of it..The one reng cost 299 bucks also have different colour.

Hope you liked it.Plsease like comment share your thoughts your love into comment and share with your friends.let me know what else you want to see in my blog. Please check my instagram and facebook for more future updates.. Thanks everyone 😘😘
Click here to see my another blog.

Monday, 21 November 2016

Makeup-look/Birthday Special/Brother's Birthday special look..

I didn't set up my mind for any makeup look, which i can put in front of you but i thought why not?? So i did this look for my elder brother's birthday 🎊 party.And  we did so much fun in a short time. But yeaahh. The fun part was when we play holi with" Birthday cake".It means when we coloured each others face with cakes.

So now change the topic.Come to to days s
Simple makeup look for Birthday party.You can also follow the cleansing toning scrubbing and mustering process. I will widely discuss it in my upcoming Blog about skin care. But for today i only want to mention that this steps help us by giving a soft clear smooth clean and bright surface for makeup.. 

Firstly what i want to say is, it takes less time for prep your face for achieve this look.So lets get started. 

Firstly apply some moisturising cream because winter is coming and in india we get that hint. So we all need that moisturiser.I have used Essentials night cream. Although it is a night cream but also gives you some moister but not heavely moisturising cream. So i apply lill bit of this cream on my face.If you want a long lasting makeup then you can apply primer.But in this look i did not want a long lasting makeup.. Because it was a short time party.Click here for Giordani gold bronzing pearls review


Follow the steps mentioned below for achieve this look. 
So i just applied some moister in my face. Nothing more then it. And It is very help full for your skin dnt try to overlook. It gives you the perfect finish. 

Please excuse that expression. Because i never ever keep my face normal. I dnt know why? Probably its my habit. Ok moving on to the next step. 

I just applied some Foundation and blend it with the makeup sponge. After using foundation i just get a glowing even tone skin. I also dis not conceal because Very me foundation also give such nice concealer effect which rare to find. And even they are not budget friendly but very me is a budget friendly Foundation under 500 Rs/-.Also with such a nice glow even tone and concealed face. 


I also use some lip blam onto my lips. Also from Oriflame. It is another my all time favourite. 
Then ,what i did is i lined my upper eye through some black long liner. I used The one eyeliner stylo black eyeliner pen. It is really easy to use and you can use it in hurry. If you are not a good liquid eyeliner lover even then, also you can find this product help full. 

Even i also am not an makeup artist or something like that so i also get little bit of scread while it comes to the Point 👉 of liquid eyeliner. But i made somethimg long winged liner kind of shape. Which you also can do it better from me.. 💐😘😘
I did it in my style you can say.. Hehehihii
I drag this line long because it gives your eyes a looot of attention. And also looks pretty cool and classy. You can also take the help of some colouring tape for a nicely perfect line. But in this look i don't use any tape because i want to make it as natural as i can.

Here is some close view

For open up my look and some freshens in my look i have used some creamy white kind of colouring kajal. It also gives a nice effect you can see it in my final look. It also makes your eyes looks bigger. And if not want to make a bigger eye makeup look then use black khol in the place of White creamy kajal. 

Ahh!!  The next step is i used some blush into my apple of checks.I used the one duo pallate. The colour is pigmented and easy to blend and specially made for our skin tone. And the star product is highlighter. I love using this. it is so pigmented. The hilightning particles are so mild and micro which you cant see. But gives you A slightly creamy finish and well pigmented.Use it on your nose for head on your apple of checks and jawline.And also take it with your finger and slightly apply it as a silver or creamy silver kind of glowing shadow. Which looks so 
pretty. I love this. 


Lastly i applied some bold dark lip colour which is some berry sort of colour. This is from pure colour reng of is affordable travel friendly easy to carry. And colour pay off is so dark and creamy and pigmented.Soft not fully but creamy texture. 
Im in great love with it. 

Hope you liked it. If you like it then dnt forget to share like and give your comments.Amd what type of post you want just give me some hint. I definitely gonna try that for sure. Please excuse my flaws.And im not any makeup artist or professional so hope you can understand me. 😘💐
You can follow me in my facebook and instagram.Till then keep smiling sharing and do check. And give comments in my posts.It means so much for me. 


Sunday, 13 November 2016

Simple Makeup Look For Sunday Evening✨

" Let the beauty we love be what we do "
 So, There is no one who doesn't love Sunday. Even including me.I really love sundays and tell me about what you guys do think..

So we all want to take a full relax in sundays or you can tell fundays. We all want to like hang out with our friends family and loved one's. So today im gonna give you a simple but gorgeous look which just takes only less than 6 mins. With a soft colour dress it looks more pretty..and you are ready for your Sunday evening. 💃

I want to share one thing that im a very lazy person. And not a big fan of heavy makeup. So,i also did this look whenever im in big rush or wanna go for shopping and dnt have much time or any hang out or When i want to go in my friend's house or my grand maa's house ,i simply did this look with just useing few products. Also i want to mention that it is a evening makeup.

Come to the look..
Before using any makeup product i just cleaned my face with a Face wash.That is 5-1 fairness face wash. Then  as i have dry skin so what i do that mixed my foundation with essentials fairness face cream.i do so because essentials have some moisturising effect so not only wipe off my skin dryness as well as give me some glow. I also share one thing that is very very USEFUL  is, if you want to skip concealer or heavily base makeup, all you want to need is a good at least one hour SLEEP😴.

Yes you are right.So as i have completed my sleep so i skipped my concealer or anything, because this time my face didn't need it. Hehehehihi. Dnt forget to take your beauty sleep it naturally makes our skin more softer more even and more brighter with freshness.
This is the look i have done..all steps are describe below
I just washed my face and i Went to my nearest Sweet shop in the morning so then i just wear my Kajal as i didn't cleanse my eye makeup properly so there is some fade kajal into my eyelid. We all did so in our lazy days.. Right?

Then i mixed my foundation with some moisturiser which i mentioned before..


After doing that i just applied my normal Oriflame pure colour kajal,which is now running in offer also. If you buy 2 kajals you can get one free in return. And the good part is it is really in cheap price only 119.In our indian Currency.It Doesn't smudge too much, after 2 or more then 2 hour it smudges little but not all the kajal smudges away or not too much smudged,it will still there. Also it is  deep black in colour. What i did is i just did a  thick tight line in my lower lashline.And then put on 2 cotes of mascara in my upper and lower lashes i just take one cote. 

After doing my eyes it looks something like 🔝this pic.

After that i just put on some blushes into my checks.It also gives me some shine in my apple of my cheeks.For that i have used  my PURe COLOur Lipstick  . It is an pretty dark burgundy or deep chocolate with a red hint of a colour.  As I'm not in the mood of using many products so i used my lipcolour as my blush. And no one can tell me im not wearing a blusher in the place of a blush..lalalala.
Dnt feel weird.Im like that 😂.If you want to wear a blush you also can. Actually in hurry i did so. So check this look.

I just used slightly lipstick for my blush.. Hmm 🐣😆

After that i just give some colour and comb my hair with my brush. And i used my Pure colour lipstick as well in my lips. So yes This is my  final and complete for sunday rocking evening..


So this is it for today's now.If you like this look then give it a try and share your views. Pls share comment my posts.Give your love through your comments I really need this. If you love this please encourage. So keep smiling and stay healthy untill my next blog.Check my instagrame i will give the products pic which i have used in this look. 
My instagrame account name is Swetleena Chatterjee. Dnt forget to check my facebook and my instagrame..
View my another blog and share comment and like if you liked it. Hope you liked it Lifestyle blog

Thursday, 10 November 2016

Review Giordani Gold Bronswing Pearls As blusher/Bronswer/Highlighter/Eye Shadow..👰👰


Hi everyone.I have come with a new review.Which is going to be veryyyy interesting.Because today i will show you how to do four different works with using only one product. Festive season's are still on so i have decided to do something, which is a time saver and the same time easy to use.Remember less time you give  for makeup is more time you get for enjoying the festivals.


Oriflame has bring Across The Giordani Gold rang which is very popular along the whole rang specially in the makeup section. My today's reviewing product is Giordani Gold Bronzing Pearls.


Giordani Gold Bronzing pearls


Love and blush with octivianaa

About Product; 

Giordani gold bronzing pearls is a Multi-coloured powered pearls that gives skin a sun kissed glow, a shimmer and a touch of healthy colour. The spun and hand shaped beads are enriched with a mineral complex for a soft caress of  comfort and subtle shimmer. 


Iconic Giordani Gold Bronzing Pearls 
Bring warmth,colour and radiance to the face,cheeks,eyes,decollete.The powdered Pearls are made from a unique combination of warm shades and Illuminating particles that enhance the complexion and add a beautiful glow with shimmering effect natural radiance.

It is enriched with  LA ElEGANZA MINERAl COMPLEX for a caress lasting comfort and good coverage.

Handcrafted Pearls
Each pearl is hand shaped by experienced master craftsman and baked carefully for superior colour pay-off..


About Packaging:


The container is like our day or night cream pot. But the difference is it also have a good quality mirror back of the cap.. The pot colour is dark black and there is a golden stripe into the border of the cap. It is travel friendly and easy to carry anywhere.
It hold a double 'G' sign at the top of the cap. Which is giordani gold's symbol.


Shades 
It has  three shades  
32081 (Natural Radiance) 
32083 (Natural Peach) 
32084 (Dark Bronze) 

I brought the natural audience. Which is match to my skin tone.It suits fair to medium light skin tone. Natural peach is for medium light to dusky complexion.And dark bronze is for medium light to dark skin tone. 


Natural Radiance


It is a pretty natural colour.It has two colours of pearls one is pink other is brown. 
All the balls have shimmering effect upon it. There are many balls. It looks so pretty itself..You can use it in different perpous.

1) Eyes: 
One can use this pearls as a eyeshadow. All you need that a eyeshadow brush and pick the brown shade and apply it into your crease then apply the pink one. Or 

If you want a natural eye just apply the brown or pink colour and apply it in your eyeshadow area and mixed it well. With the help of a clean brush. 


2),3) Blush and Highlighter:

You can take a blusher brush or the sponge comes wit in it to swirl generous amount of  pink pearls or brown pearls or both. Apply it through apple of your cheeks.Dnt forget to make a smiling 😆 face while applying.This one product not only gives blush into your cheeks but also give highlighter effect along with blusher. You dnt need any other highlighter to enlighten your high points. The blush is so natural. No one can tell you that you have applied a blusher to beautify your face. It would be seems your natural glow and blush. And i like this part😘😘..thnkyyyy giordani gold pearls for that. 


Bronze:

Lastly left the brown zing effect. For that take that concealer brush or the sponge to Swirl the brush across  the brown pearls and brush the pearls then apply to your jawline your top forehead hairline chin and to give some definition into your nose rub the brown pearls into your finger and apply it to the side of  your nose. And blend it welly then take some slight pink pearls and softly rub single time into the bridge  of your nose. It gives you a sharp nose look. 

Product Quality:

The pearls are pigmented.Not broke out easily.Colour payoff is good.suits fair to medium complexion welly.Shimmer perticales are so mild.once you drop any pearls it will broke some pieces.So work it carefully. But there is nothing to worry about dust. It will gives you same effect like the pearls. I know it because my sister drop some pearls and then she use that dust powder within small pieces it gave her same effect.

My applied pics:

It will look same in your desiring face part

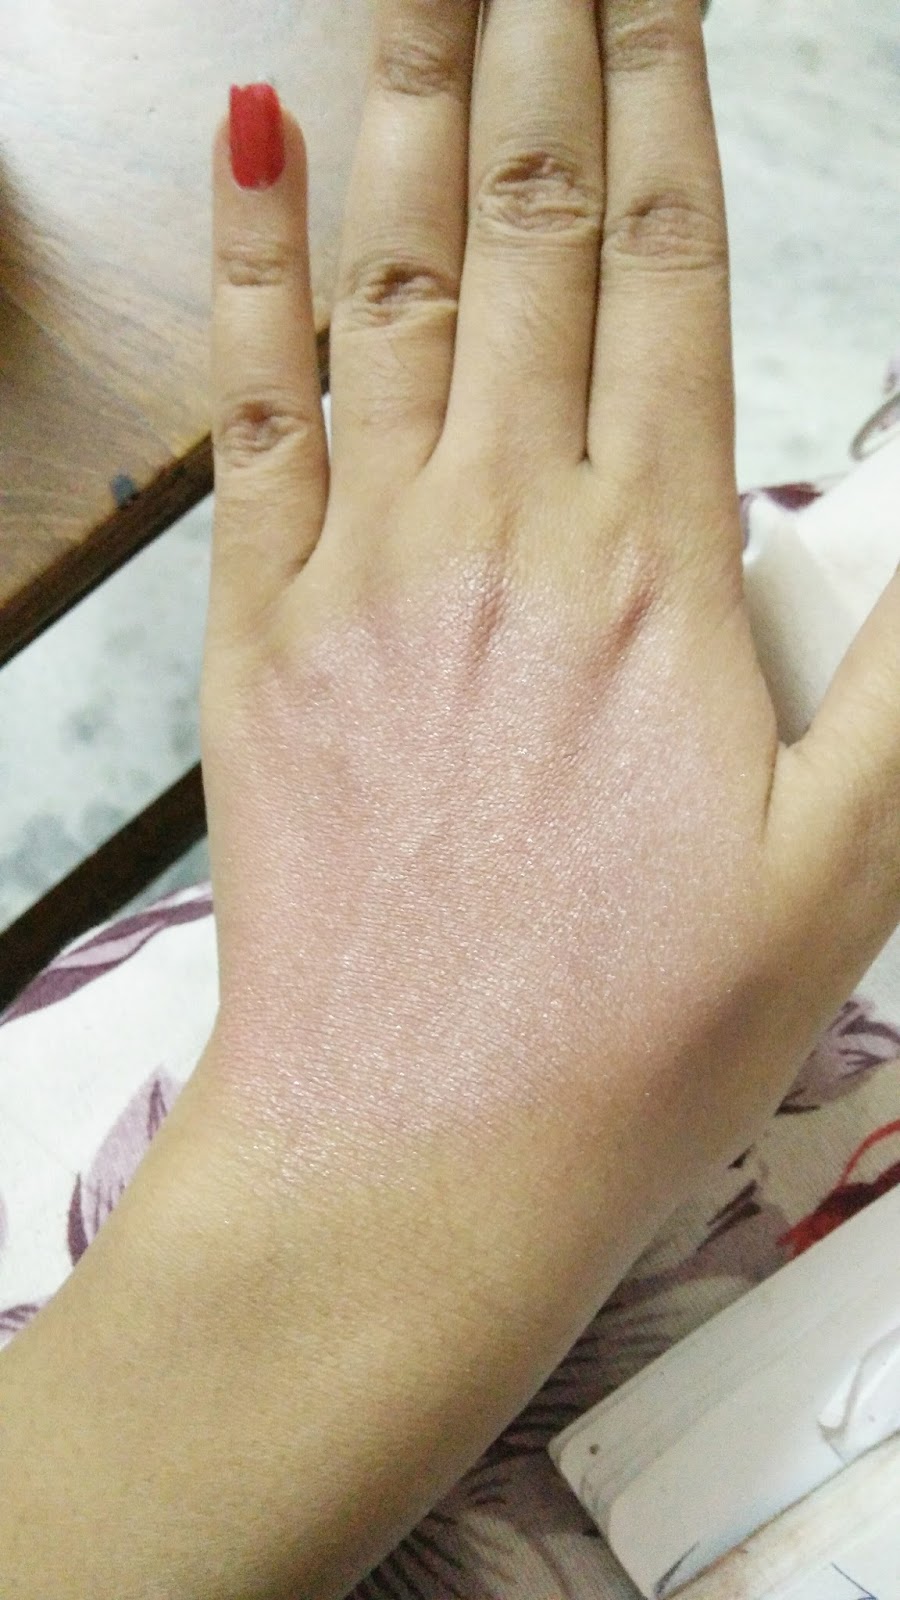
Left side is pink pearls and Right side is brown pearls.So apply this pearls after your foundation or Compact or cc cream you are good to go with a simple glowing look. 


So im definitely going to use this pearls in my upcoming makeup look. What do you think about this product???tell me about your experience and share your thoughts 💭 

You can share this with your favourite persons.Stay tune until my next blog and till then keep smiling ☺ and live healthy 💃💃


Monday, 24 October 2016

Makeup Look For Diwali 🎉🎉


Hi friends how r you all. Am pretty much excited about my first makeup look suggestion for you.I specially did it for upcoming Diwali.In India we celebrate Diwali with lots of 🎉🎉🎉🎉🎉🎉🎉🎉 crackers,fireworks,lights,sweets,and also do Pujas of Lord laxmi And we bengolies usually do Maa Kali Puja. Which is our goddess of power and  strength.

Whenever it comes to makeup I am getting very excited.So I tried a green smokey eye look hope you may like it. If you have liked it ,dnt forget to give your comments and share it with your close ones your friends whom you want.


This is the look.Lets start the steps.
Firstly I wash my face wash with essentials 5-1 face wash.It is a very good product.It instantly removes all the tan and gives a fair bright healthy skin.Im in love with this one. Then I have used my Oriflame primer for a long lasting makeup look. And stick some golden tapes to the corner of my eyes for a nicely finished eye makeup look.
Step - 1

Then rub some primer into your eyes and then apply a green kajal or liner.I have used the shade from double trouble section.Fill up the green kajal or liner into your eyes it doesn't need any perfection.Just apply it to your upper eye area.It will be the base of the eyeshadow.The double trouble by Oriflame is very pigmented so only 1-2 time  is enough for base.one thing that you should keep in your mind is dnt pull off the golden tapes remember it will give a nice edge for eyeshadow and eyeliner.You can wear green eyeliner how much area you want to line with green eyeliner or kajal.

Step-2 

The third step of this makeup is put on few brushes of green eyeshadow.Im using the Touch ND glow wet n dry Duo eyeshadow.If you wet your eyeshadow brush and then take some green eyeshadow and then apply it will give a more intense green colour.But now I'm not doing this step.I just simply pick up the eyeshadow from the shadow palate and dab it over my wide, thick green liner.
Step -3
After finishing the dabbing part just mixed the eyeshadow and the previous green liner welly.You can use a clean brush for use but I used the Oriflame eyeshadow brush.Then apply the reddish-brown shade from Touch n glow wet n dry pallate over the green eyeshadow.But dnt pull it of till the eyeshadow.Then blend the brown shade.It compliments the green eyeshadow.This two gives a nice combination and give also some definition to your eys.Then it will be look like this pic below here. 
.
Step -4
The main thing about any look is just blending your eyeshadow properly it enhance your beauty. So now I'm doing that I'm just blending my all two shadows carefully for that any harsh edges doesn't stay.It Is the work of patience 😊.Then put of little bit of green shadow into its place and also some brown colour into its place and again give it a nice blend.And after finishing the last blend you colour are ready to rock. And now you can take some rest..You can eat something or whatever you want to give yourself a bit of relax. 
Then come bake to the work.It hasn't finished yet.Then you can apply whatever eyeliner style you want to recreate With the help of the glu golden tapes.It gives your eyeliner a perfect and nice shape.Also apply the green liner into your lower and upper lash line and smudge the green eyeliner with the help of  green eyeshadow. 
Step-5

I skiped one step that is pull off the golden tapes.After pull off you can find a sharp eye shadow and eyeliner edge.You can find it in the above picture.


Step -6
After pull it off you can find the good eyeliner loOK and nicely blend eyeshadow and long liner. It also really happens that small eye gets a bigger look.

Now  take a tissue and gently clean your underwear area.It gives you a clear face for makeup.Then I used my Very me smoothie foundation all over face and neck.It  gives a perfect glow fairness.Then I used Oriflame compact to set my makeup.
Then apply highlighter into apple of your cheecks,bridge of nose,chin,And forehead.You can also find that suddenly your face reflects lights and your face is lookong so bright and fair.Then applyed tiny bit of blush top of apple of my cheeks.Then im wearing some pretty pink shade not so vibrant colour.Which is from the one rang.And dnt forget to give some highlighter into the inner corner of my eyes.For that reason it appears 5x more brighter 🔆. Then makes it more noticeable by wearing 1-2 quote of mascara.It just give a big curly and volume Long lashes.. I'm using the one volume blast mascara.It is also a water proof long stay mascara too.


And now it is the time to wear your favourite clothes and enjoy this Diwali with the company of This green eye smoky and pretty sweet pink blush colour kind of lip colour look. Hope you liked it. please let me know how is this look. And pls try this look and share your experience.So my complete look is below.For now Tata. See you in my next blog.Till then stay happy and gorgeous.Have a safe and very Happy Diwali to all of you.
If you want to buy any of this products please click here and cmmnt or message me